How to Prepare Your Backyard for a Pool
Many homeowners mistakenly believe that pool construction begins with excavation. In reality, the success, longevity, and overall cost of your project depend heavily on what happens before the heavy machinery even arrives on your property. Proper site preparation prevents structural shifting, protects your home’s foundation, avoids catastrophic utility disruptions, and saves you thousands of dollars in unexpected delays. This comprehensive guide walks you through every crucial phase of prepping your yard to ensure your installation goes smoothly from start to finish.
1. Zoning, Permits, and Access Logistics

Before falls or fractures can be mended in your landscape, you must clear the legal and logistical hurdles mandated by your local municipality. Every city and county has strict zoning laws regarding property lines and easements. An easement is a legal right of way that utility companies or local governments hold over a portion of your land. Building over an easement is strictly prohibited and can result in the forced removal of your structure at your own expense.
Beyond easements, you must secure a variety of building, electrical, and plumbing permits. These permits ensure that your project complies with regional safety standards, including proper fencing and barrier laws designed to prevent accidental drownings. During this phase, you must also consider physical access to your yard. Heavy excavation machinery requires a clear path that is at least eight to ten feet wide. You may need to temporarily remove sections of fencing, get permission from neighbors to cross property lines, or clear away low-hanging roof structures to accommodate the sheer size of the construction vehicles.
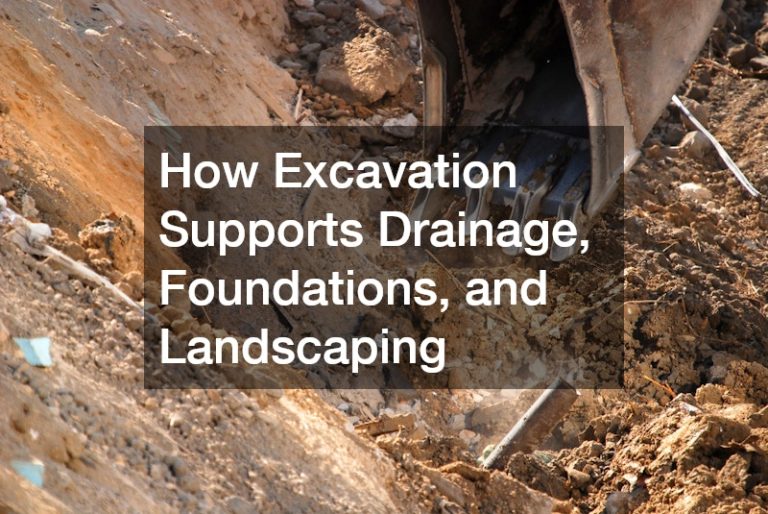
2. Under the Surface: Clearing Hidden Utilities
One of the most dangerous and costly mistakes a homeowner can make is failing to accurately locate underground utility lines. Your backyard is a hidden maze of high-voltage electrical wires, high-pressure gas lines, fiber-optic communication cables, and water pipes. Striking a gas line or main power cable can result in severe injuries, widespread community blackouts, and astronomical fines from utility providers.
To prevent this, you must contact your local utility location service well in advance of any digging. In most regions, calling a centralized hotline will prompt various utility companies to visit your property and mark the exact locations of their lines using color-coded spray paint or flags. Do not make the mistake of assuming you know where the lines are just because you remember where the meters are located. Utility paths often curve or cut diagonally across yards to find the shortest path to the main street grid. Once these lines are clearly marked, your construction layout can be adjusted to maintain a safe, legal distance from these critical pathways.
3. Tree Management and Structural Canopy Evaluation
Trees add immense beauty, shade, and value to a landscape, but they are often the natural enemies of an aquatic construction site. When planning your layout, you must conduct a thorough evaluation of the existing canopy. Trees located too close to the construction zone pose several immediate and long-term threats. In the short term, falling leaves, twigs, pollen, and sap will relentlessly clog your filtration system, throw off your water chemistry, and create an endless maintenance headache.
In the long term, aggressive root systems present a much more sinister threat. As trees grow, their roots spread horizontally in search of moisture, exerting immense pressure against underground structures. These roots can easily crack vinyl liners, shift fiberglass shells, and fracture concrete plumbing lines. To protect your investment, you will need to completely remove any trees whose root zones intersect with the footprint of the construction site. Because dropped limbs and heavy trunk sections can cause catastrophic damage to your house or neighboring properties, you should always hire a certified local tree removal company to handle the complex physics of dropping massive trees safely. Working with an insured, experienced tree removal business guarantees that the workers possess the specialized rigging, cranes, and liability coverage necessary to protect your home throughout the clearing process.
4. Soil Testing, Grading, and Surface Stripping

The structural integrity of any large water feature relies entirely on the stability of the soil beneath it. Water is incredibly heavy, weighing roughly eight pounds per gallon. A standard backyard pool holds tens of thousands of gallons, translated into immense, constant downward pressure on the earth. If the soil is unstable, prone to shifting, or highly expansive, the entire structure can settle unevenly, causing catastrophic cracks and structural failures.
A professional soil test should be conducted to determine the composition of your earth. Soils with high clay content expand dramatically when wet and shrink when dry, requiring specialized engineering adjustments. Sandy or rocky soils present different excavation challenges that your builder must account for. Once the soil profile is understood, the ground must be stripped of all organic matter. Grass, sod, topsoil, and decaying organic debris must be entirely scraped away, as leaving organic material beneath a structure leads to soft spots as the material decomposes. Additionally, the overall grading of the yard must be evaluated to ensure that natural rainwater runoff is directed completely away from the pool edge to prevent erosion.
5. Managing Root Systems and Stump Disposal
Once the main trunks and branches of problematic trees have been cleared away, the subterranean battle begins. Simply cutting a tree down to a stump is not enough. The remaining underground root system will slowly rot over several years. As the wood decays, it leaves behind hollow underground voids. The weight of the surrounding earth, combined with the immense weight of the nearby water, will cause the ground to collapse into these voids, leading to severe sinkholes and shifting under your decking.
Therefore, complete tree removal requires a dedicated focus on the below-ground components. Heavy machinery, such as industrial stump grinders or track-hoes, must be brought in to mechanically chew away the stump and pull the primary lateral roots out of the earth. This process thoroughly disrupts the soil matrix, meaning the excavated area will need to be refilled with clean, structural fill dirt and mechanically compacted in thin layers to restore the load-bearing capacity of the ground. Skipping this intensive compaction process practically guarantees that your surrounding walkways will sag and crack within a few seasons.
6. Subterranean Insect Hazards and Mitigation
Excavation acts as a massive earthquake to the local insect population. When bulldozers and backhoes begin tearing through the topsoil and subsoil, they disrupt centuries-old ecosystems hidden beneath the surface. This sudden disruption can create immediate, dangerous hazards for the construction crew and long-term structural threats to your property. Ground-nesting insects, in particular, become highly aggressive when their homes are systematically destroyed by heavy machinery.
Yellow jackets often build massive, hidden colonies in abandoned rodent burrows or rotten root cavities just beneath the grass line. If an excavator strikes one of these nests, thousands of angry, stinging insects will swarm the area, halting work immediately and creating a severe liability hazard. If you discover a subterranean nest during your site preparation, you should immediately halt work and call a professional yellow jacket exterminator to safely neutralize the colony before anyone steps back onto the property. Furthermore, turning over the soil stirs up wood-destroying insects that may have been feeding on old roots. To prevent these pests from migrating toward your home’s foundation or new timber retaining walls, implementing a proactive program for termite control across the disrupted zone is an essential preventative measure.
7. Enlisting Regional Experts for Pest Defense

Every geographic region faces its own unique environmental and pest challenges. High-humidity climates and coastal areas are particularly notorious for harboring massive populations of subsurface pests that thrive in wet, disturbed soil. When you introduce a massive water source to a backyard, you naturally alter the local water table and moisture levels in the immediate soil, drawing local pests toward the area like a magnet.
If you are building in the southeastern United States, for example, you are dealing with some of the most aggressive termite and stinging insect pressures in the country. To ensure your property is protected according to local building codes and environmental realities, you should partner with a licensed north carolina pest control firm during the early excavation phases. A specialized north carolina exterminator understands how regional soil types interact with chemical barriers, allowing them to apply targeted, long-lasting treatments to the open earth before it is permanently sealed away under tons of stone, steel, and concrete.
8. Structural Engineering and Pouring the Shell
With the land cleared, utilities mapped, and pests mitigated, the physical creation of the pool shell can finally begin. This phase represents the structural core of your project. The exact process depends on whether you have chosen a vinyl liner, a pre-formed fiberglass shell, or a custom sprayed concrete structure. Because of its unmatched durability and design flexibility, custom concrete remains the gold standard for luxury installations.
First, a complex framework of steel rebar is woven throughout the excavated pit, creating a high-strength metal skeleton that mirrors the exact shape of the future pool. Once the steel grid passes rigorous municipal inspections, a highly specialized concrete company is brought in to apply the structural shell. Using high-pressure hoses, workers blast a dense mixture of shotcrete or gunite onto the steel framework, hand-troweling the material into a seamless, rock-solid basin. This process requires incredible artistry and technical precision, as the concrete must be perfectly uniform in thickness to handle the intense hydrostatic pressure of the surrounding earth. Once sprayed, the concrete shell must undergo a strict curing process, often requiring the homeowner to spray the shell with water multiple times a day for several weeks to ensure the material achieves its maximum rated strength.
9. Establishing a Level Perimeter and Drainage Paths
Once the structural shell of your in ground pool is safely in place and fully cured, focus shifts to the immediate perimeter. The area directly surrounding the coping must be meticulously prepared to transition from a rugged construction zone into a beautifully finished entertainment space. This involves refilling the gaps between the exterior of the shell and the excavated dirt walls with clean, well-draining gravel or crushed stone.
Proper drainage during this phase cannot be overstated. You must design a comprehensive deck drainage system, such as trench drains or slot drains, to capture rainwater and pool splashes. If water is allowed to pool against the exterior of the concrete shell, it can create hydrostatic pressure that attempts to lift the entire structure out of the ground, or it can slowly erode the supporting soil underneath. The ground surrounding the perimeter must be mechanically compacted and perfectly leveled using a laser transit to ensure that the final decking lays entirely flat without any dangerous tripping hazards or low spots where water can stagnate.
10. Finishing the Surround with Interlocking Hardscapes
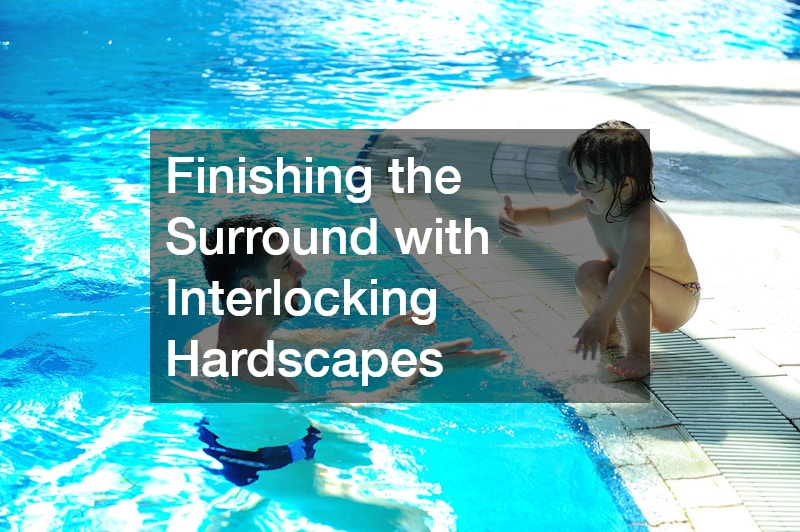
The final phase of site preparation involves laying the foundation for your pool deck. While poured concrete is a common choice, many premier designers and hardscape professionals strongly advocate for the use of interlocking stone or pavers. A pool deck is exposed to extreme environmental abuse, including constant moisture, harsh sanitizing chemicals, intense UV rays, and natural ground movement caused by seasonal freeze-and-thaw cycles.
Utilizing individual concrete pavers provides an incredibly durable, flexible solution for your pool surround. Unlike solid concrete slabs, which inevitably crack over time as the ground undergoes natural shifting, individual pavers can flex independently, absorbing ground movement without fracturing. Furthermore, if you ever need to access underground plumbing lines for repairs in the future, pavers can be individually removed and replaced seamlessly, saving you from having to jackhammer and patch a solid concrete deck. The preparation for these pavers involves laying a highly compacted gravel base, followed by a thin, smooth layer of bedding sand, creating an ideal, stable surface that allows rainwater to drain away naturally while maintaining a cooler surface temperature under bare feet.
Though coordinating utility markings, pest barriers, heavy excavation equipment, and complex masonry work can feel overwhelming, the long-term payoff is immeasurable. When you are finally floating in pristine water, surrounded by a flawlessly leveled deck and a safe, stable landscape, the hard work of preparation will fade into the background. You will be left with a beautiful, structurally sound backyard retreat that will bring joy, relaxation, and fond memories to your family for decades to come.